The PAVS User Manual
PAVS is an acronym for Physical Agents Vehicle Small, which is a small vehicle for indoor environments, and its basic use will be described in the following document.
- Connection methods
- Start the vehicle chassis and sensors
- Start the SLAM program
- Start the navigation program
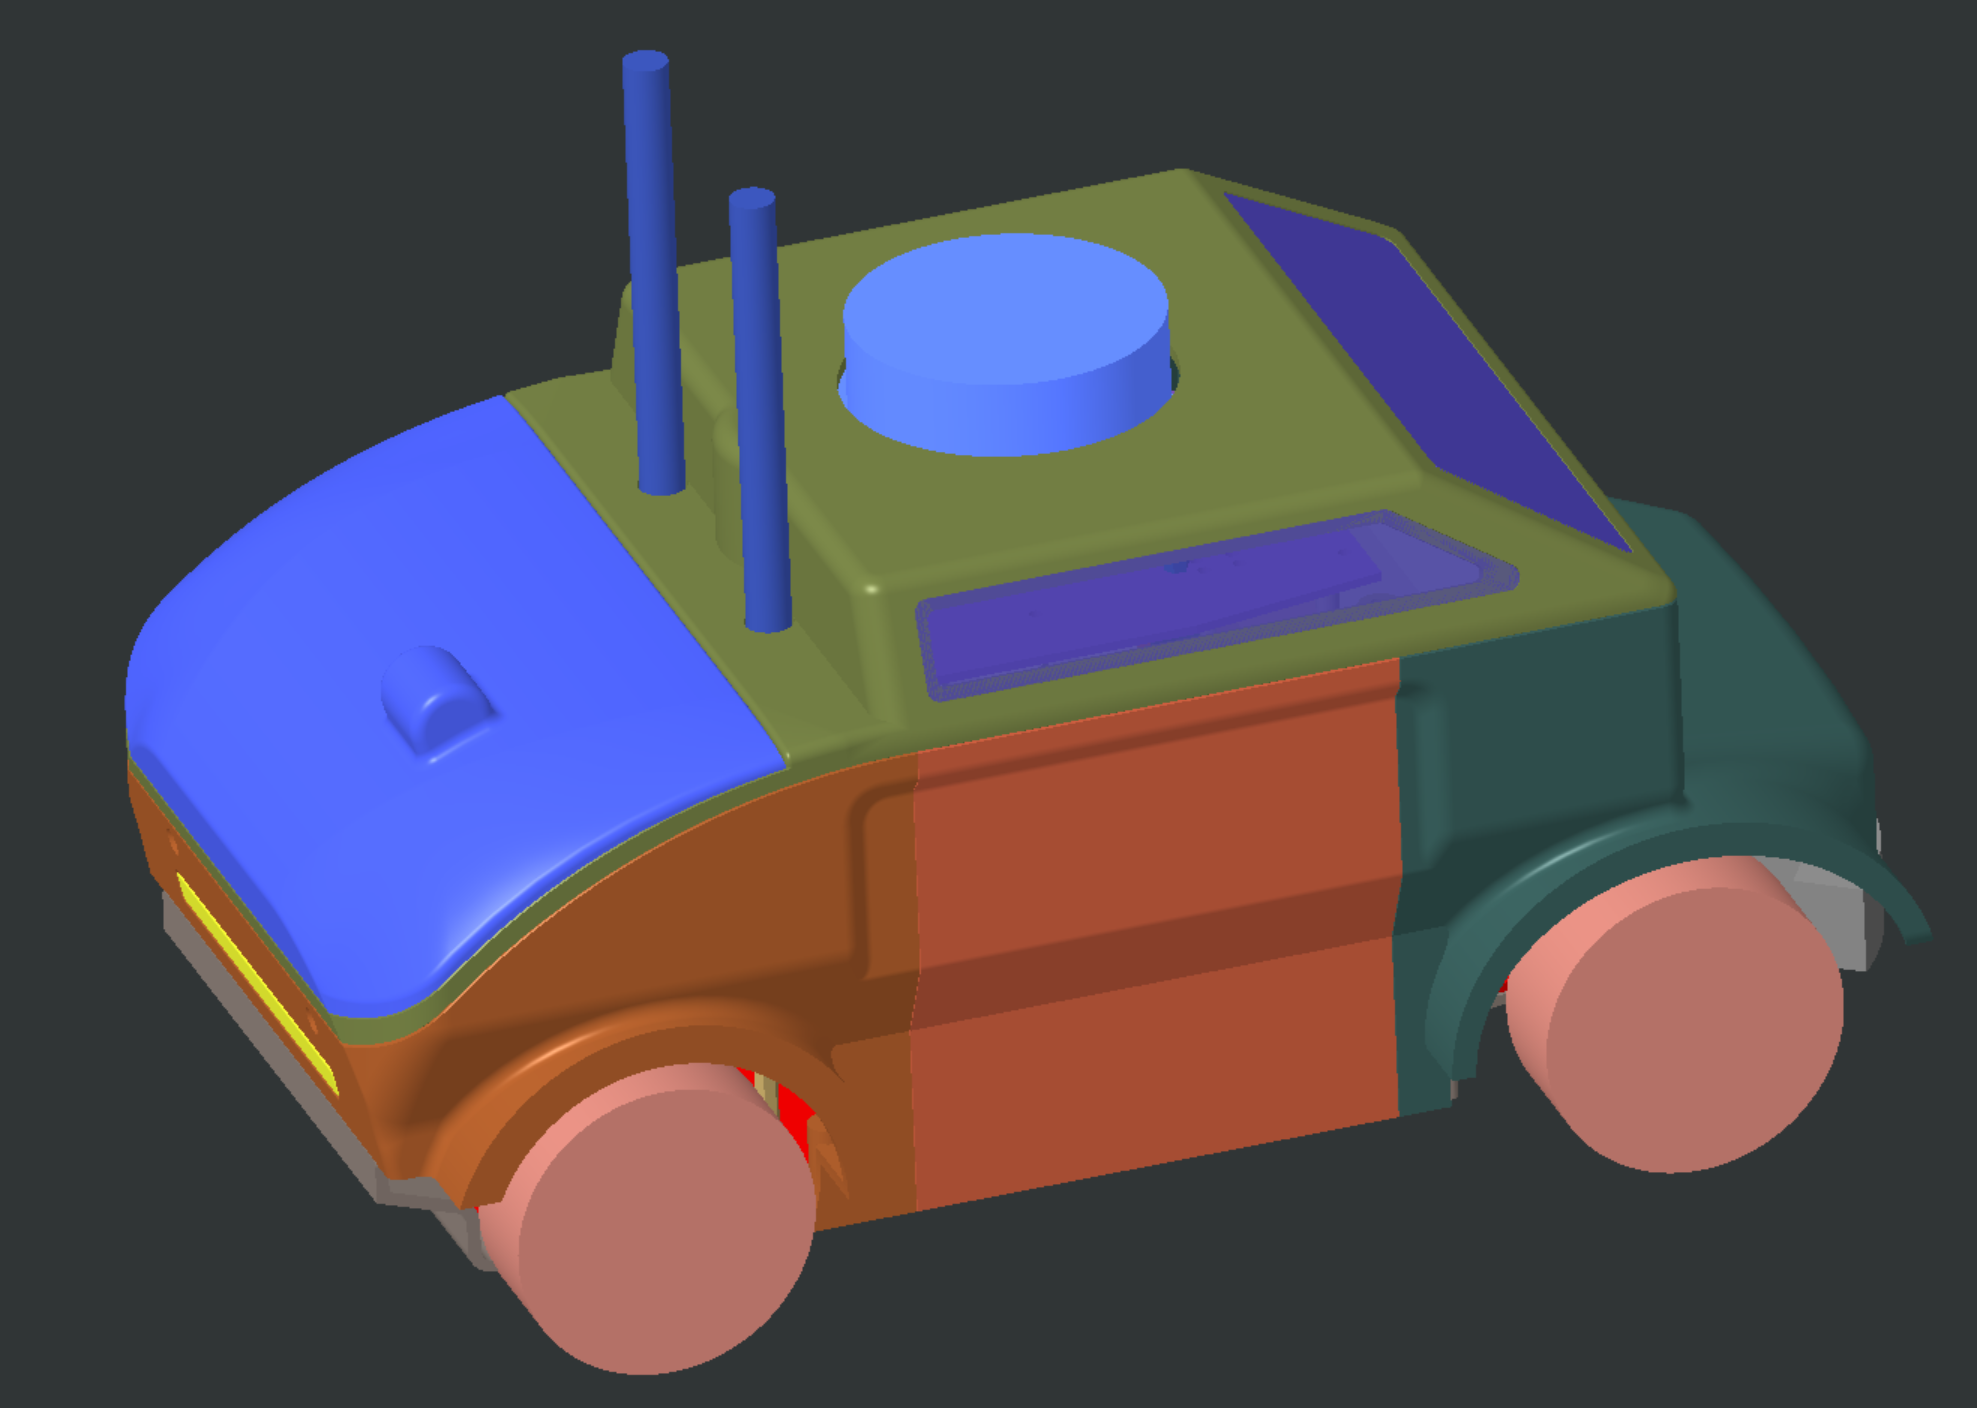
First, the model diagram of the vehicle is shown below:

Connection Methods
There are many ways to connect to a vehicle’s internal port, such as through VNC viewer, SSH, Jupyter Notebook, etc., or connecting a monitor plugged into the vehicle will work.
When first familiarizing yourself with the vehicle software framework, we recommend that you use a monitor plugged into the on-board computing board (e.g., NVIDIA Computer’s HDMI connector), which provides a visual interface for familiarizing yourself with the internal operating system.
Reserve at least one USB port for the keyboard and mouse kit, which can help you with wireless network configuration and so on.
Once you have configured your network, you can view your IPv4 address via the ifconfig command. After that, you can connect via VNC viewer or SSH (we will use SSH as an example below).
The command line usage of SSH is as follows:
ssh jetson@192.168.xx.xx
The default username is jetson, and the default password is iscas.
Additionally, we prefer that you use VS code for SSH connections during this process.
As soon as you have connected to the terminal inside the vehicle, you can start some programs to run the vehicle.
Multi-machine Communication
We elaborate on the implementation of multi-machine communication, particularly between a Local Computer (personal computer) and PAVS (Physical Agents Vehicle Small). For example, control instructions sent from the local terminal are received and executed by the vehicle.
Environments Description
Suppose the IP of your Local Computer and PAVS are as follows,
192.168.1.27    # Local Computer
192.168.1.101   # PAVS
Settings
We now describe how to set up multi-machine communication based on the above scenario. The main idea is to define the master nodes and hostnames of the PAVS and the local computer.
Set PAVS
export ROS_MASTER_URI=http://192.168.1.101:11311    # PAVS IP
export ROS_HOSTNAME=192.168.1.101                   # PAVS IP
The ROS_MASTER_URI refers to the IP of PAVS, and also ROS_HOSTNAME uses the IP of PAVS.
Set Local Computer
export ROS_MASTER_URI=http://192.168.1.101:11311    # PAVS IP
export ROS_HOSTNAME=192.168.1.27                    # Local Computer IP
The ROS_MASTER_URI refers again to the IP of PAVS, but now the IP in ROS_HOSTNAME is the one of the Local Computer.
Validation
We will verify the correctness of the settings described above and demonstrate the results of multi-machine communication.
PAVS
In the terminal of PAVS, run the following command.
roscore
Local computer
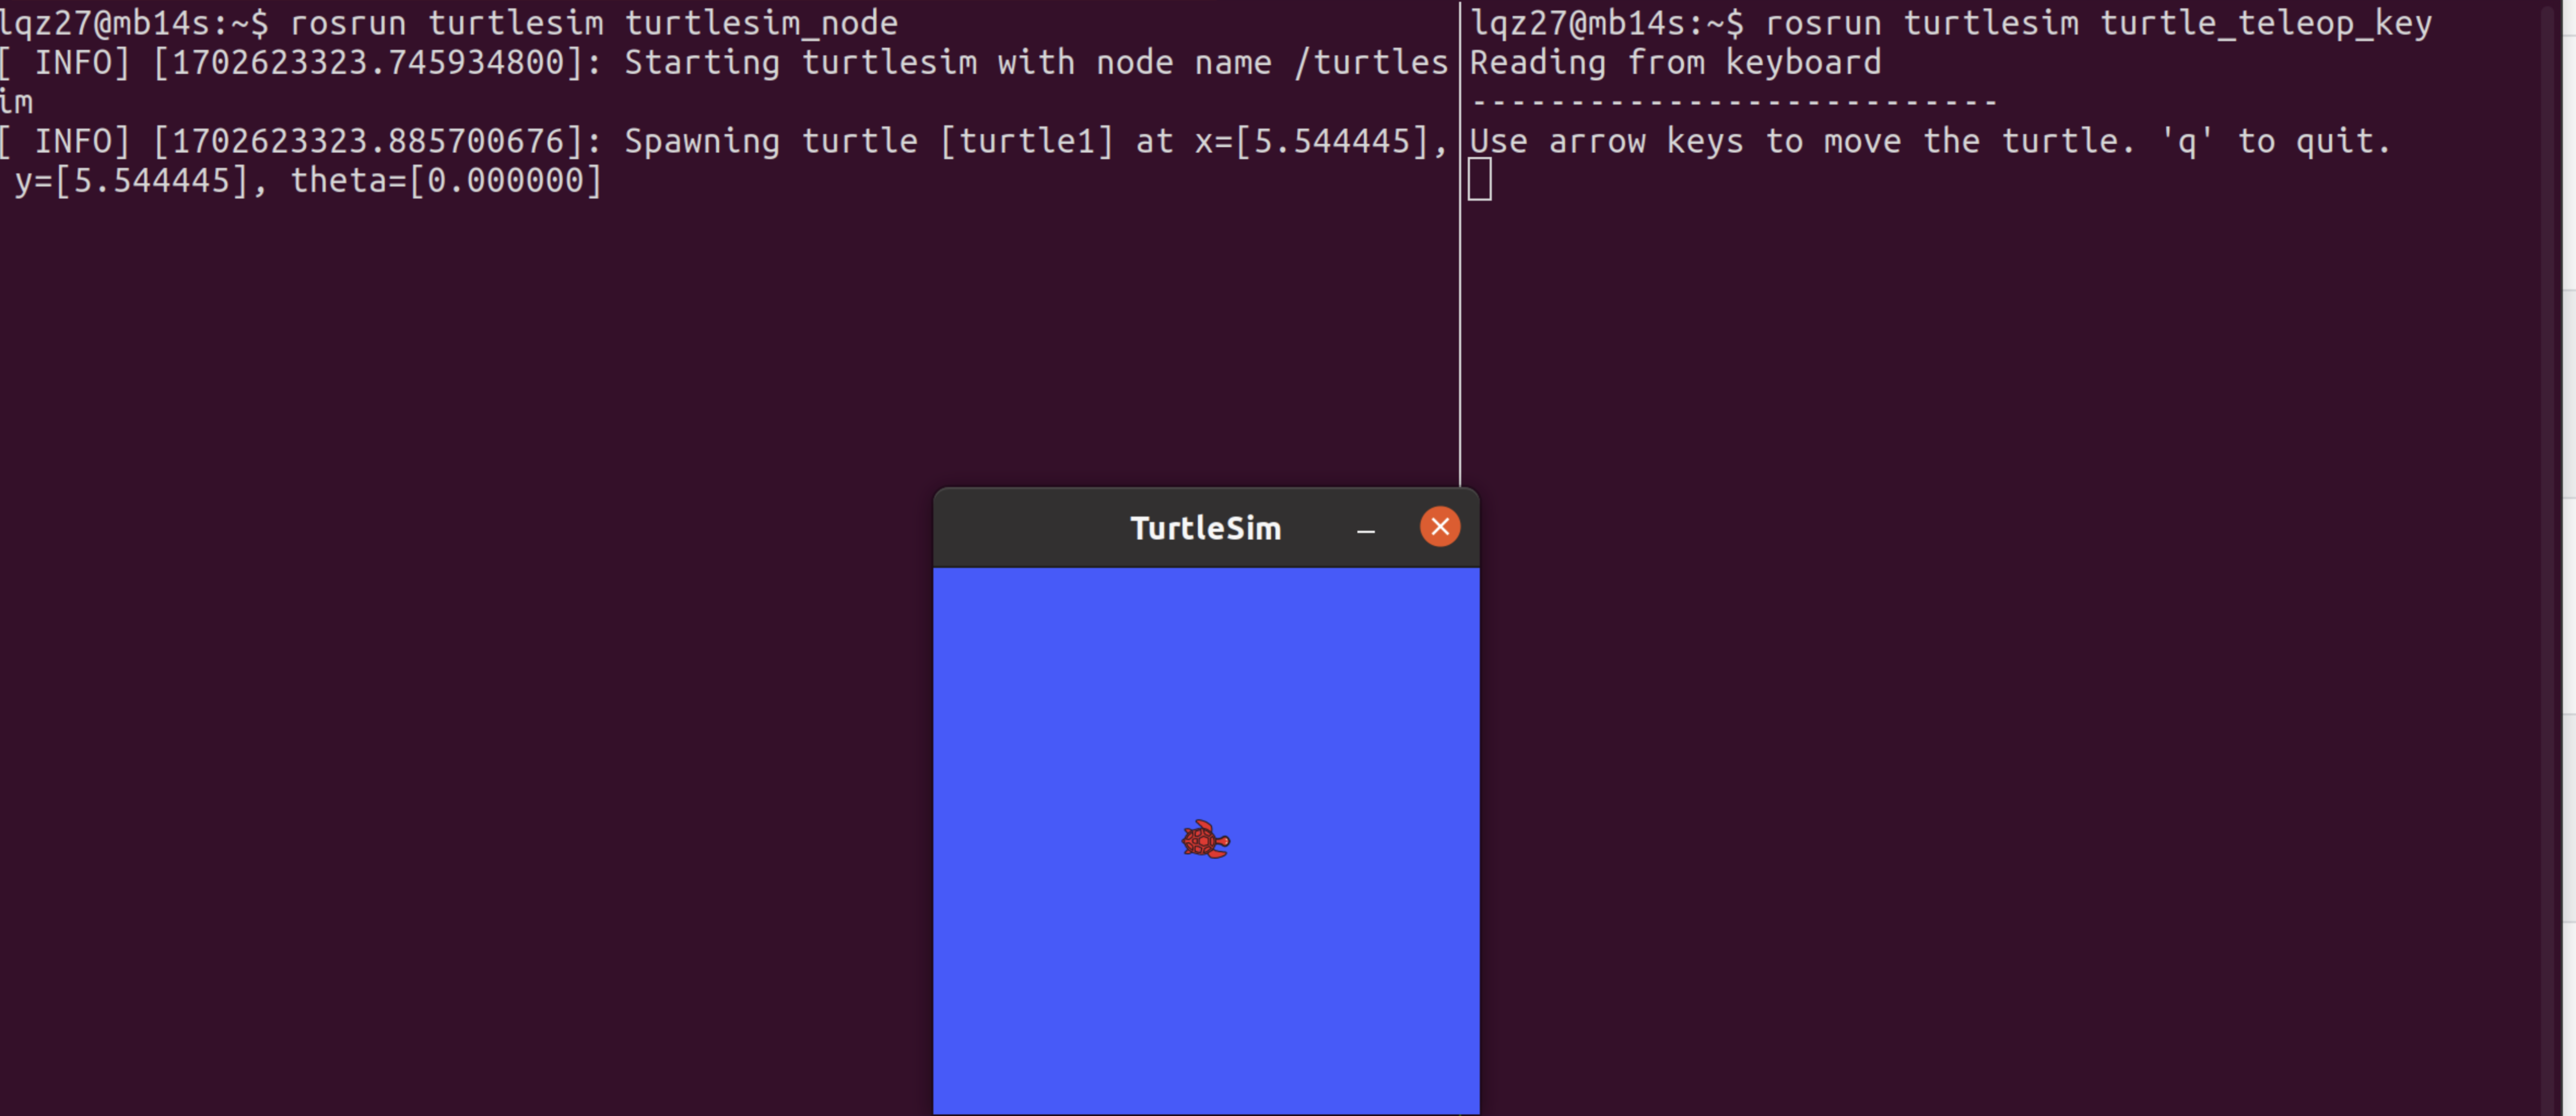
In two terminals on the Local Computer, run the following commands.
rosrun turtlesim turtlesim_node         # in a terminal
rosrun turtlesim turtle_teleop_key      # in another terminal
Following the given commands, you’ll be able to transmit commands from your Local Computer’s keyboard through the roscore on the PAVS, and ultimately, have them received and executed by the turtle on the Local Computer, as depicted in the diagram below.

Start the Vehicle Chassis and Sensors
Firstly, launch chassis and sensors driver and sensors of the vehicle.
roslaunch pavs_bringup pavs_chassis_and_sensors.launch
With the chassis booted, you can view the current list of messages via the rostopic list, e.g. /cmd_vel is the topic for which the chassis expects twist subscribers.
At this point, launch another terminal, again using SSH to connect to the vehicle, and enter the following commands to test that the motors and servos are working properly.
rostopic pub /cmd_vel geometry_msgs/Twist "linear:
  x: 0.1
  y: 0.0
  z: 0.0
angular:
  x: 0.0
  y: 0.0
  z: 0.5" -r 10
If the chassis was successfully activated, the vehicle should have moved forward and turn left by now.
The cordinate which ROS uses is right-handed, and the direction of the z-axis is upward. Moreover, counterclockwise is the positive direction.
Start the SLAM Program
After that, you can test if the SLAM program works properly.
roslaunch mapping_baselines pavs_map.launch
When the program is started, you can check for message output by typing rostopic echo /map in the vehicle’s terminal, which normally outputs a number of matrices containing decimal values between 0 and 1, which represent the probability of an obstacle being present in the grid.
The default SLAM algorithm is gmapping and you can conveniently switch between algorithms by passing arguments on the command line: for example, if you want to use cartographer, you can use the following command:
roslaunch mapping_baselines pavs_map.launch map_type:=cartographer
Further, you need to control the vehicle movement via a remote controller or a keyboard control node.
Warm reminder: Try not to let the vehicle hit the obstacles during mapping.
When the map is created, you can execute map.sh under the ~/ISSPA/src/isspa_mapping/mapping_baselines/scripts directory to save your map.
A quick way to search for this script is roscd, used as follows:
roscd mapping_baselines/scripts
Then execute the following command:
./map.sh

# If you are using ``cartographer``, use ``cartographer_map.sh``
./cartographer_map.sh
Eventually, the maps will be saved to the ~/ISSPA/src/isspa_mapping/mapping_baselines/maps/ directory with the name map.
At this point, you will find the following two files:
ISCAS@ISCAS:~/ISSPA/src/isspa_mapping/mapping_baselines/maps$ ll
total 640
drwxrwxr-x 2 chw chw   4096 Jan 16 20:46 ./
drwxrwxr-x 6 chw chw   4096 Dec 19 16:37 ../
-rw-rw-r-- 1 chw chw 640052 Jan 16 20:46 map.pgm
-rw-rw-r-- 1 chw chw    191 Dec 16 20:46 map.yaml
where map.pgm is the grip map and map.yaml is the configuration file for the map.
Start the Navigation Program
Once you have activated the vehicle’s chassis and sensors, and you have obtained a grid map, it is then possible to realize the task of fixed-point navigation!
roslaunch navigation_stack pavs_navigation.launch
By now, you will be able to test the effectiveness of the navigation algorithms on RVIZ by selecting points on the map that are free of obstacles.